ServiceNow Integration App
ServiceNow provides cloud-based services that automate enterprise IT operations. ServiceNow specializes in IT service management (ITSM) applications and provides forms-based workflow application development. It supports third-party application and data integrations. The most common integrations are for configuration management, incident management, problem management, change management, user administration, and single sign-on authentication.
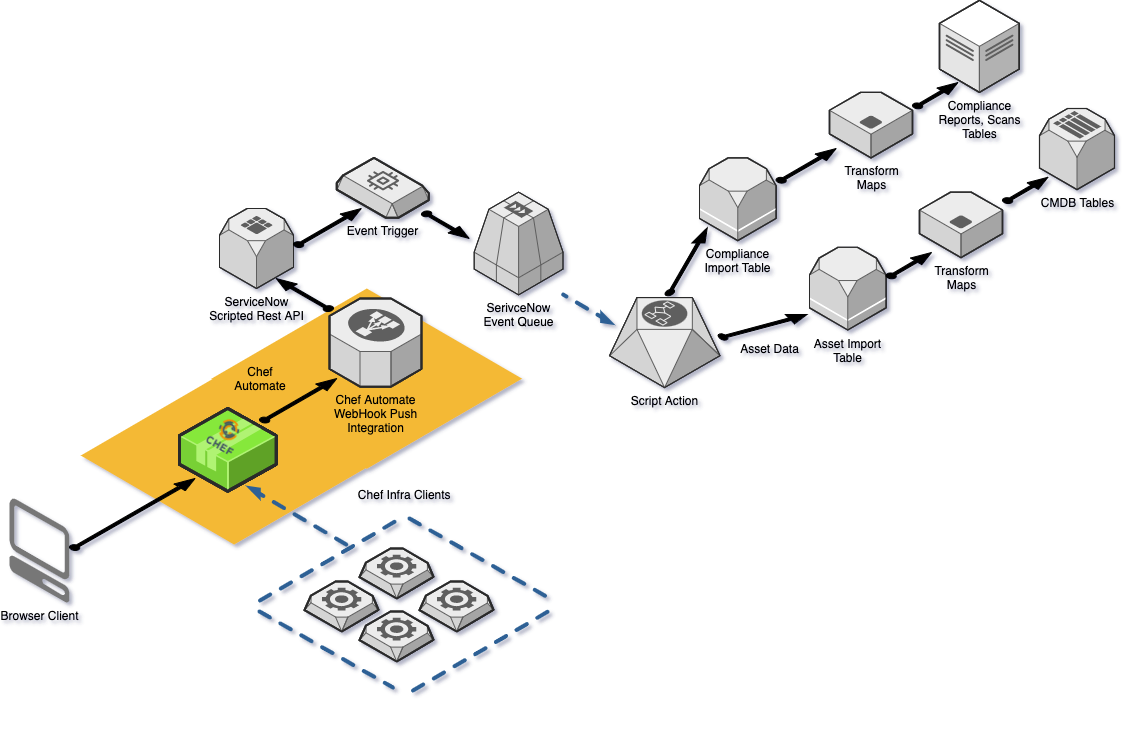
The Chef Automate Integration App for ServiceNow, also called the Integration App, integrates Chef Automate with ServiceNow. This app is a ServiceNow-certified scoped application available from the ServiceNow store. It integrates existing Chef Automate infrastructure and compliance functionality with ServiceNow enterprise services. Once installed and configured, this integration enables Chef Automate to create and update a ServiceNow Configuration Management Database (CMDB) with data from nodes managed by Chef Automate. Chef Automate aggregates information about infrastructure nodes, the Chef Infra Client runs, and Chef Compliance scans, helping you monitor your infrastructure in real time.
The Integration App works by exposing the REST API endpoints for communication between Chef Automate and ServiceNow. Chef Automate sends HTTPS JSON data feeds to the app in ServiceNow to create and update the ServiceNow CMDB, client run, and compliance report tables.
Prequisites
User Requirements
- Your unique ServiceNow URL. It has the format:
https://ven12345.service-now.com. - Once the Integration App requires the
x_chef_automate.apirole to configure it. Your ServiceNow administrator can enable this for you.
System Requirements
- A running Chef Automate instance.
- Chef Automate has a valid SSL/TLS certificate from a trusted certificate authority (CA).
- A running ServiceNow instance.
- The ServiceNow instance is reachable on port 443.
Required ServiceNow Plugins
Install following ServiceNow plugins from the Service Management dashboard:
- System Import Sets
com.glide.system_import_set, min version 1.0.0. - Configuration Management (CMDB) 1.1.
- Configuration Management for Scoped Apps (com.snc.cmdb.scoped) 1.0.0.
Install
Get the app from the ServiceNow store and then install it to your account from the Service Management dashboard.
Setup
To see your data in ServiceNow, you need to create a data feed for Chef Automate. You can set up the data feed either in Chef Automate or in ServiceNow.
Setting up the data feed requires the x_chef_automate.api role permissions. Your ServiceNow administrator can enable this for you.
Create a Data Feed in Chef Automate
Set up a data feed to send data from Chef Automate:
Confirm that you have the
x_chef_automate.apirole.Navigate to Settings > Data Feeds > Create Data Feed.
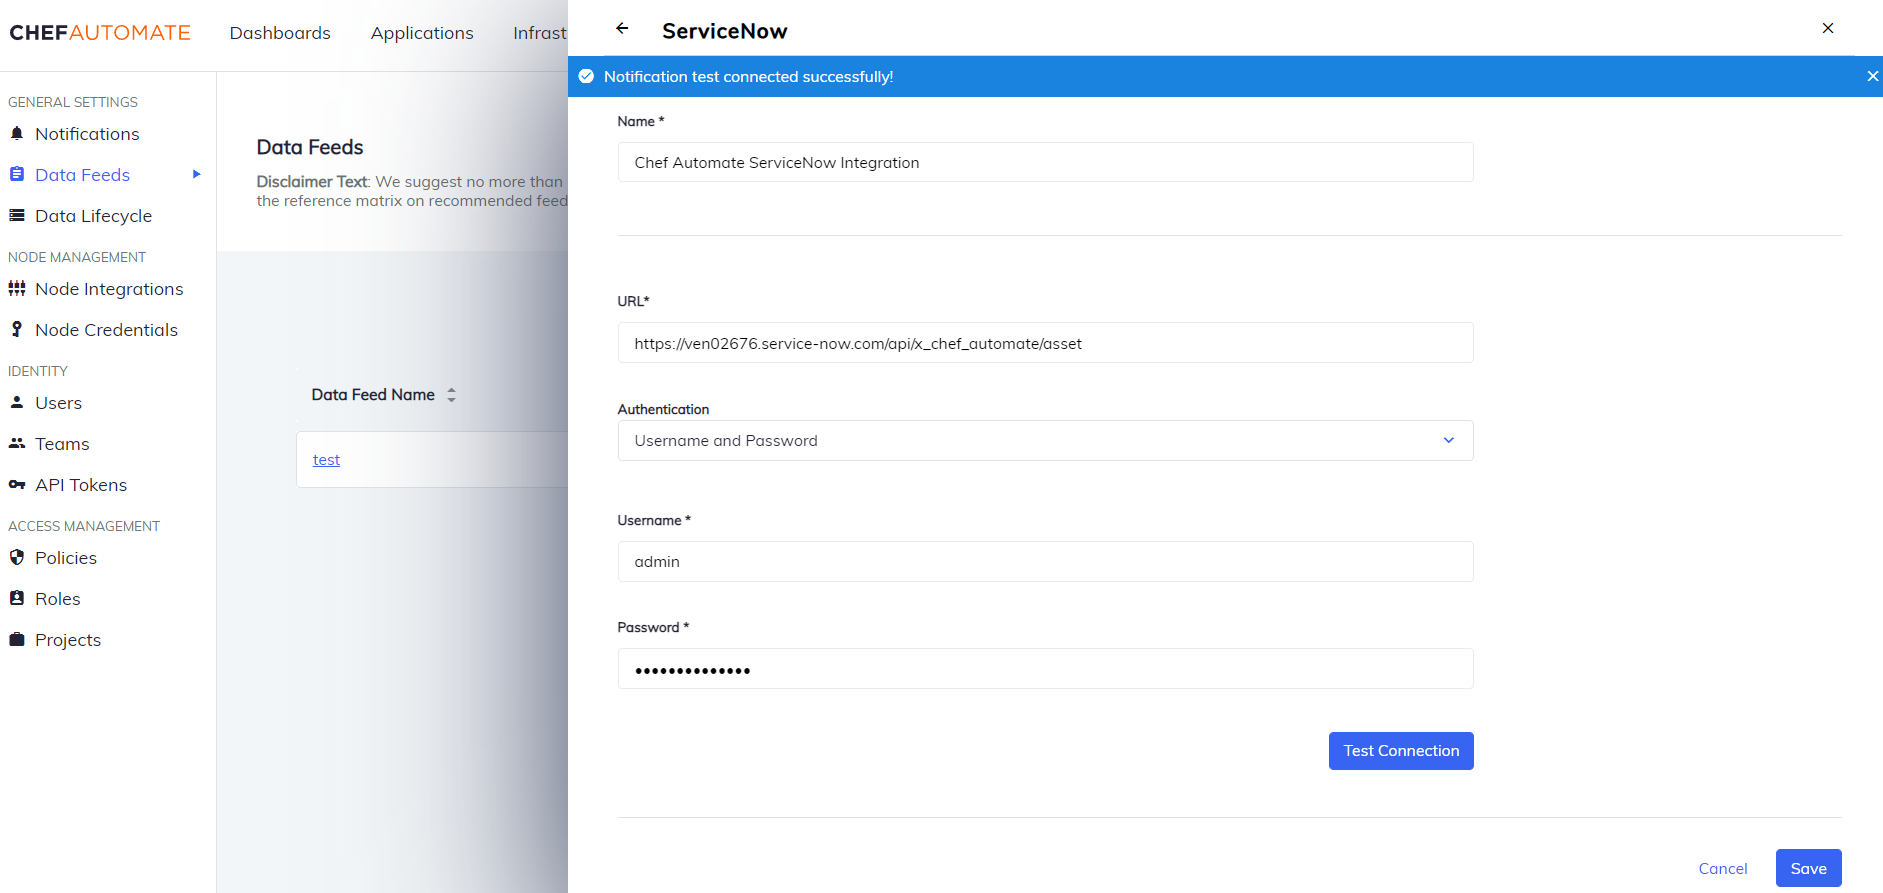
Enter or select:
- Name: A unique name for this integration.
- Data Feed URL:The API address that the notification uses. It has the format:
https://ven12345.service-now.com/api/x_chef_automate/asset. - Username: The name you use to sign in to ServiceNow.
- Password: The password you use to sign in to ServiceNow.
Select Test Data Feed. A successful test displays service-now automate connectivity passed. An unsuccessful test returns a message with infomation for the connectivity or credentials issues to helps resolve the error.
Select Create Data Feed to save the setup.
Create a Connection from ServiceNow
Follow these steps connect the Integration App to Chef Automate:
Confirm that you have the
x_chef_automate.apirole.Navigate to the ServiceNow instance.
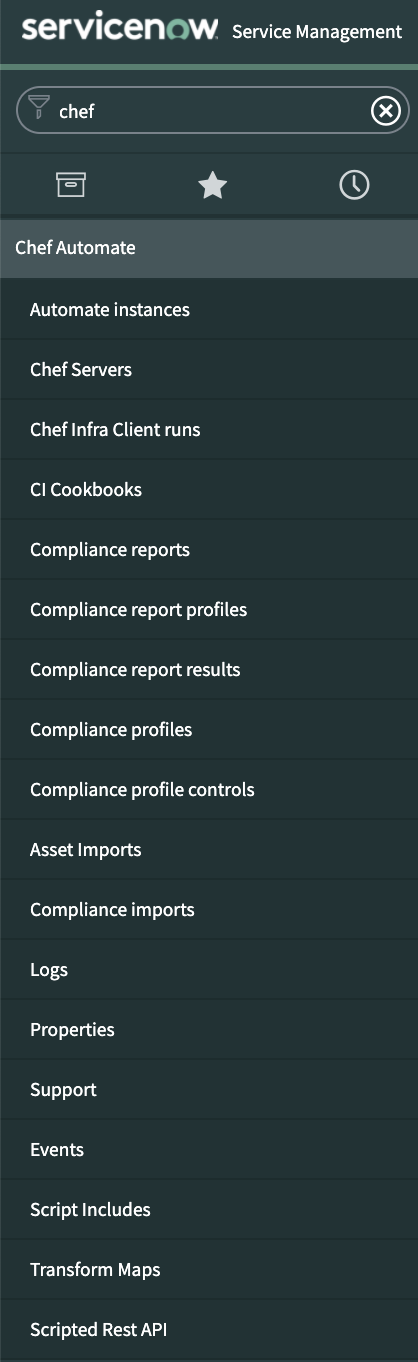
Locate Chef Automate from the search bar.
Select the Automate Instances module.
Select the New button.
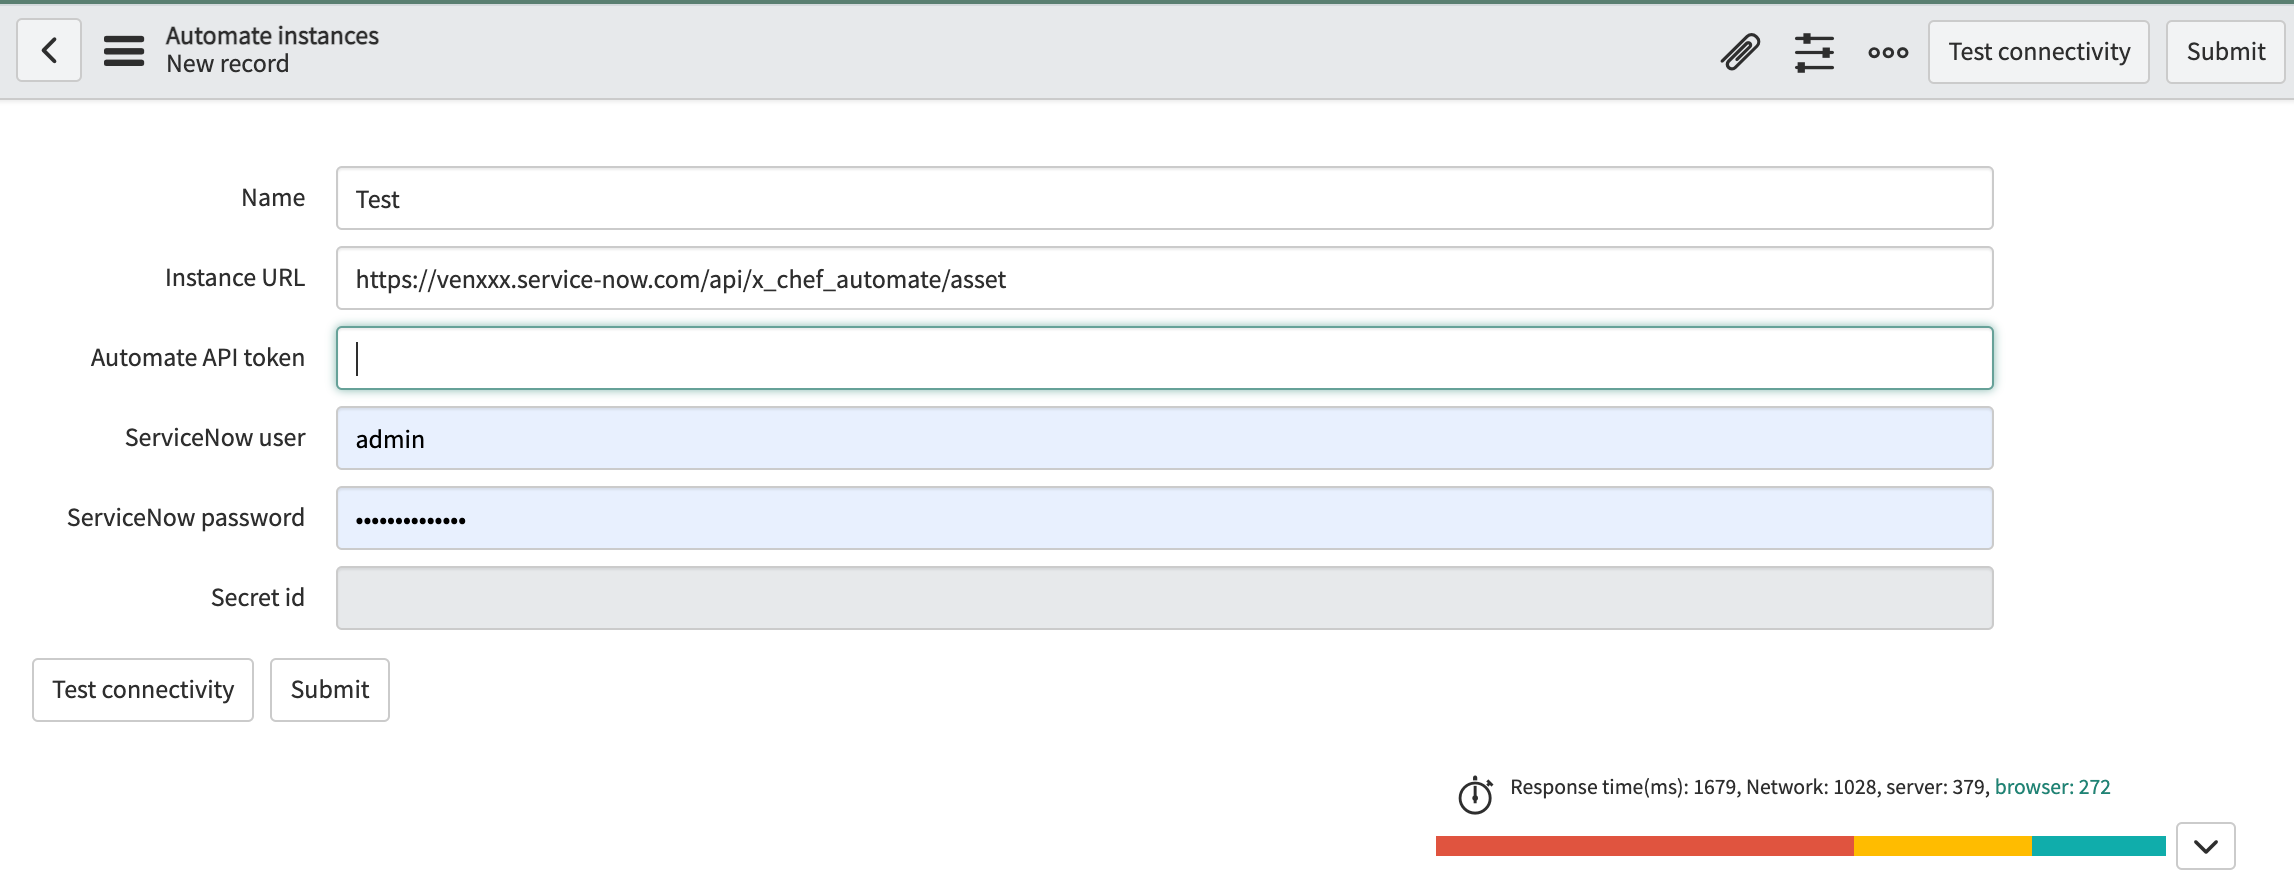
Enter the following details:
- Name: A unique name for this integration.
- Instance URL: The Chef Automate URL.
- Automate API token: A Chef Automate API token with data-feed-service authorization.
- ServiceNow user: The name you use to sign in to ServiceNow.
- ServiceNow password: The password you use to sign in to ServiceNow.
Select the Test Connectivity button. The Integration App checks that the values are correct and test the connection with Chef Automate.
- A successful test displays a service-now automate connectivity passed message.
- An unsuccessful test results in an error message with suggestions for resolving the connection or credentials problems.
Select Submit. The ServiceNow app creates the Chef Automate instance detail.
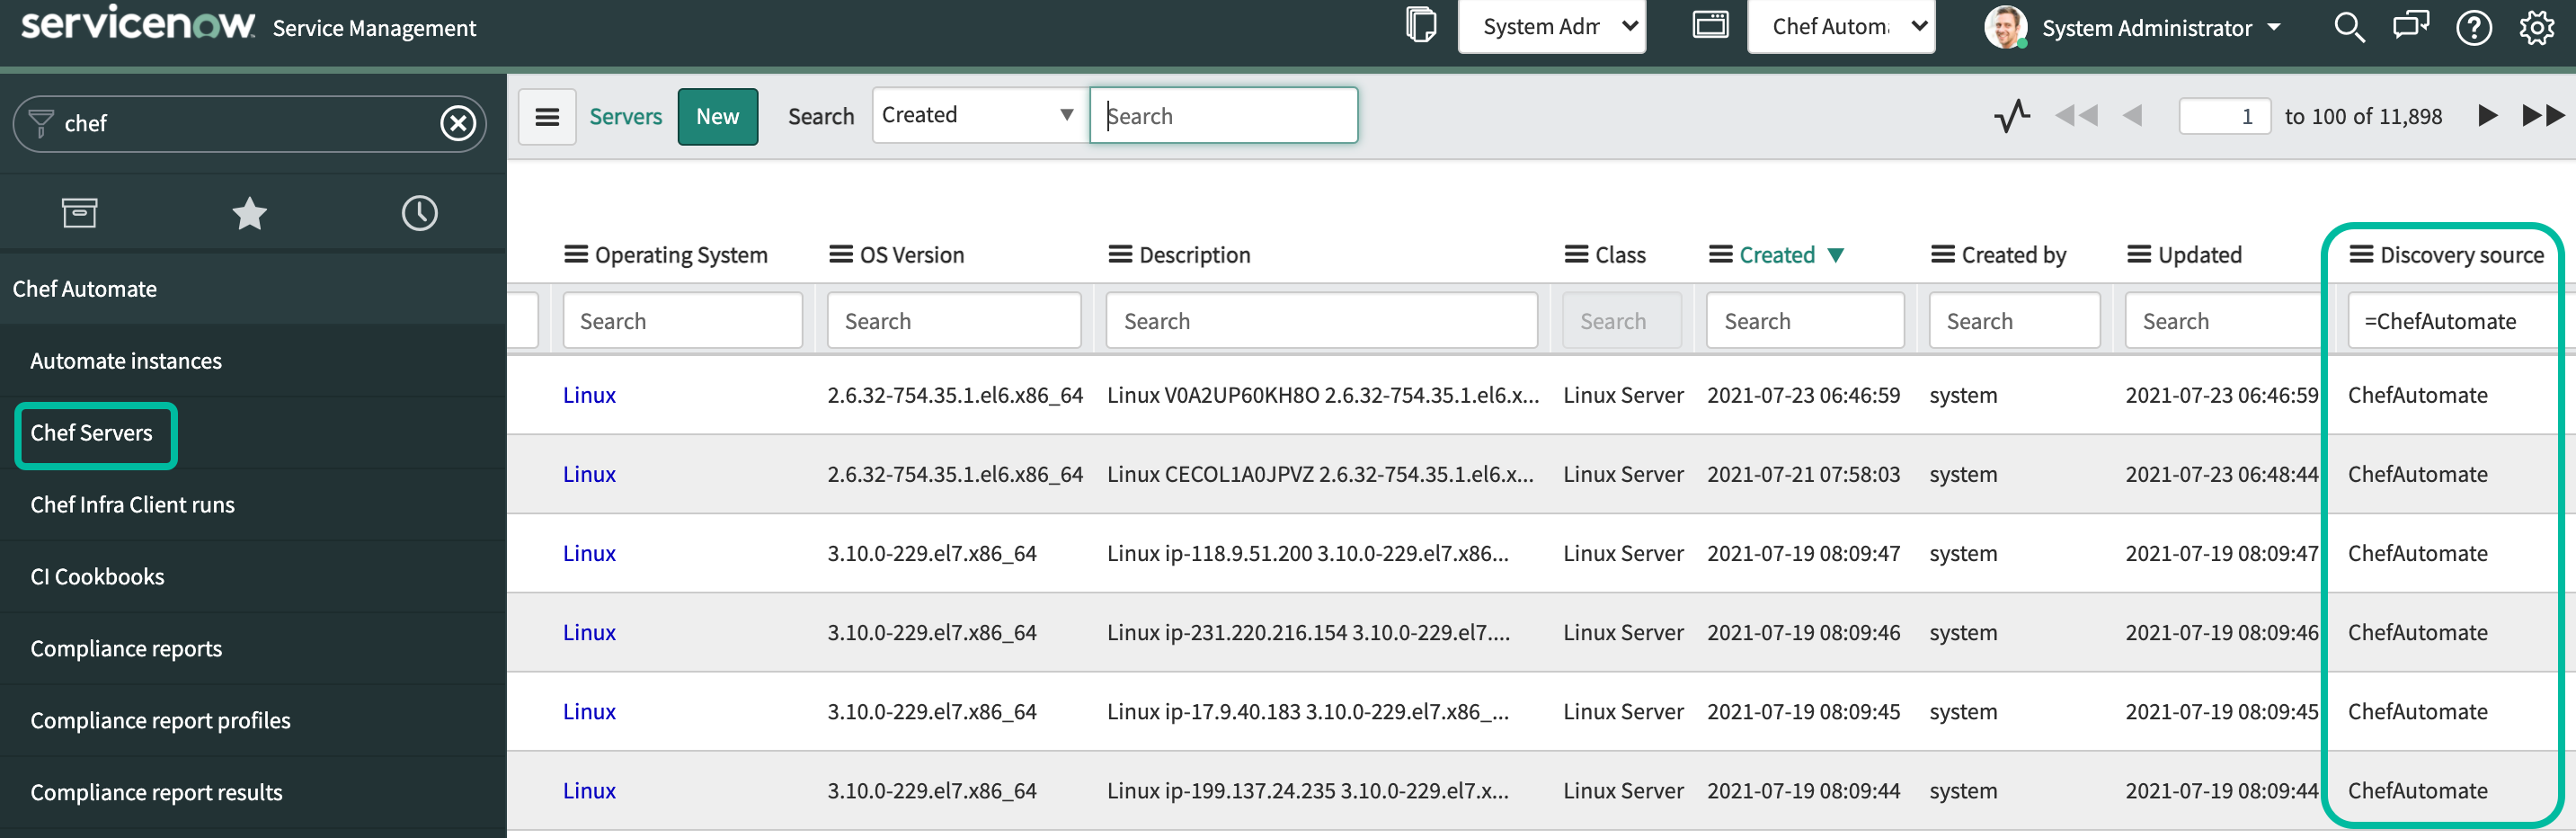
Integration App Overview
When you install and setup the Integration App, the Chef Automate appears in the ServiceNow navigation pane.
- Automate Instances module allows the user to configure the integration with Chef Automate.
- Server module displays a list of servers in the CMDB module.
Server Module
Integration App updates the CMDB file systems and software tables. It adds associated data from Chef Automate to the servers for:
- Client Runs
- Attributes
- Compliance Reports
Discovery Source
The Integration App augments the existing CMDB servers and inserts new servers into the ServiceNow CMDB. The Integration App uses the ServiceNow Discovery IRE (Identification and Reconciliation Engine) to insert or update servers.
The Integration App distinguishes between discovered Configuration Items (CIs) and imported CIs. CIs discovered by the Integration App have a default value of Chef Automate in the Discovery Source field in the cmdb_servers table.
Client Runs
You can view the data for a Chef Infra Client run by selecting a server from the list. The Client Run record displays information for:
- Client run cookbooks: cookbooks executed during the Chef Infra Client run.
- Client run lists: run lists executed during the Chef Infra Client run.
- Client run recipes: recipes executed during the Chef Infra Client run.
The complete Chef Infra Client run details are available for each server. Chef Infra Client runs are available from the Client Runs module.
Attributes
You can view the current attributes for a server by selecting the attributes record. The entire OHAI attributes are available for each server.
Compliance Reports
You can view the Compliance report detail from a server record by selecting the name on an individual Compliance report. The Compliance Report record displays related information for:
- Compliance report profiles: all profiles executed during the compliance scan.
- Compliance report results: all results from the compliance scan.
Also, you can view the Compliance report profile to display the individual results for each profile. The entire Chef Compliance Report details are available for each server. Compliance reports are also available from the Compliance report module.
Automate Instances Module
You can configure the Integration App from either ServiceNow or Chef Automate.
Change Integration App Properties in ServiceNow
Find Chef Automate in ServiceNow.
Select the Chef Automate > Properties in the left navigation pane to open the Chef Automate Properties.
Make your changes.
Select Save.
Chef Automate Settings
feed_interval- The frequency in hours for refreshing the data feed. The duration between data feed refreshes is proportional to the node count, with more nodes requiring higher settings. Valid values: Any integer in the range of
2to8. Default:4. node_batch_size- The testing executed for a benchmark. The size of a compliance scan is proportional to the number of profiles applied. Scans exceeding 4MB may fail or display incorrectly in reports. Use a lower
node_batch_sizesetting to reduce the number of profiles applied in a single batch. Valid values: Between1and30. Default:15.
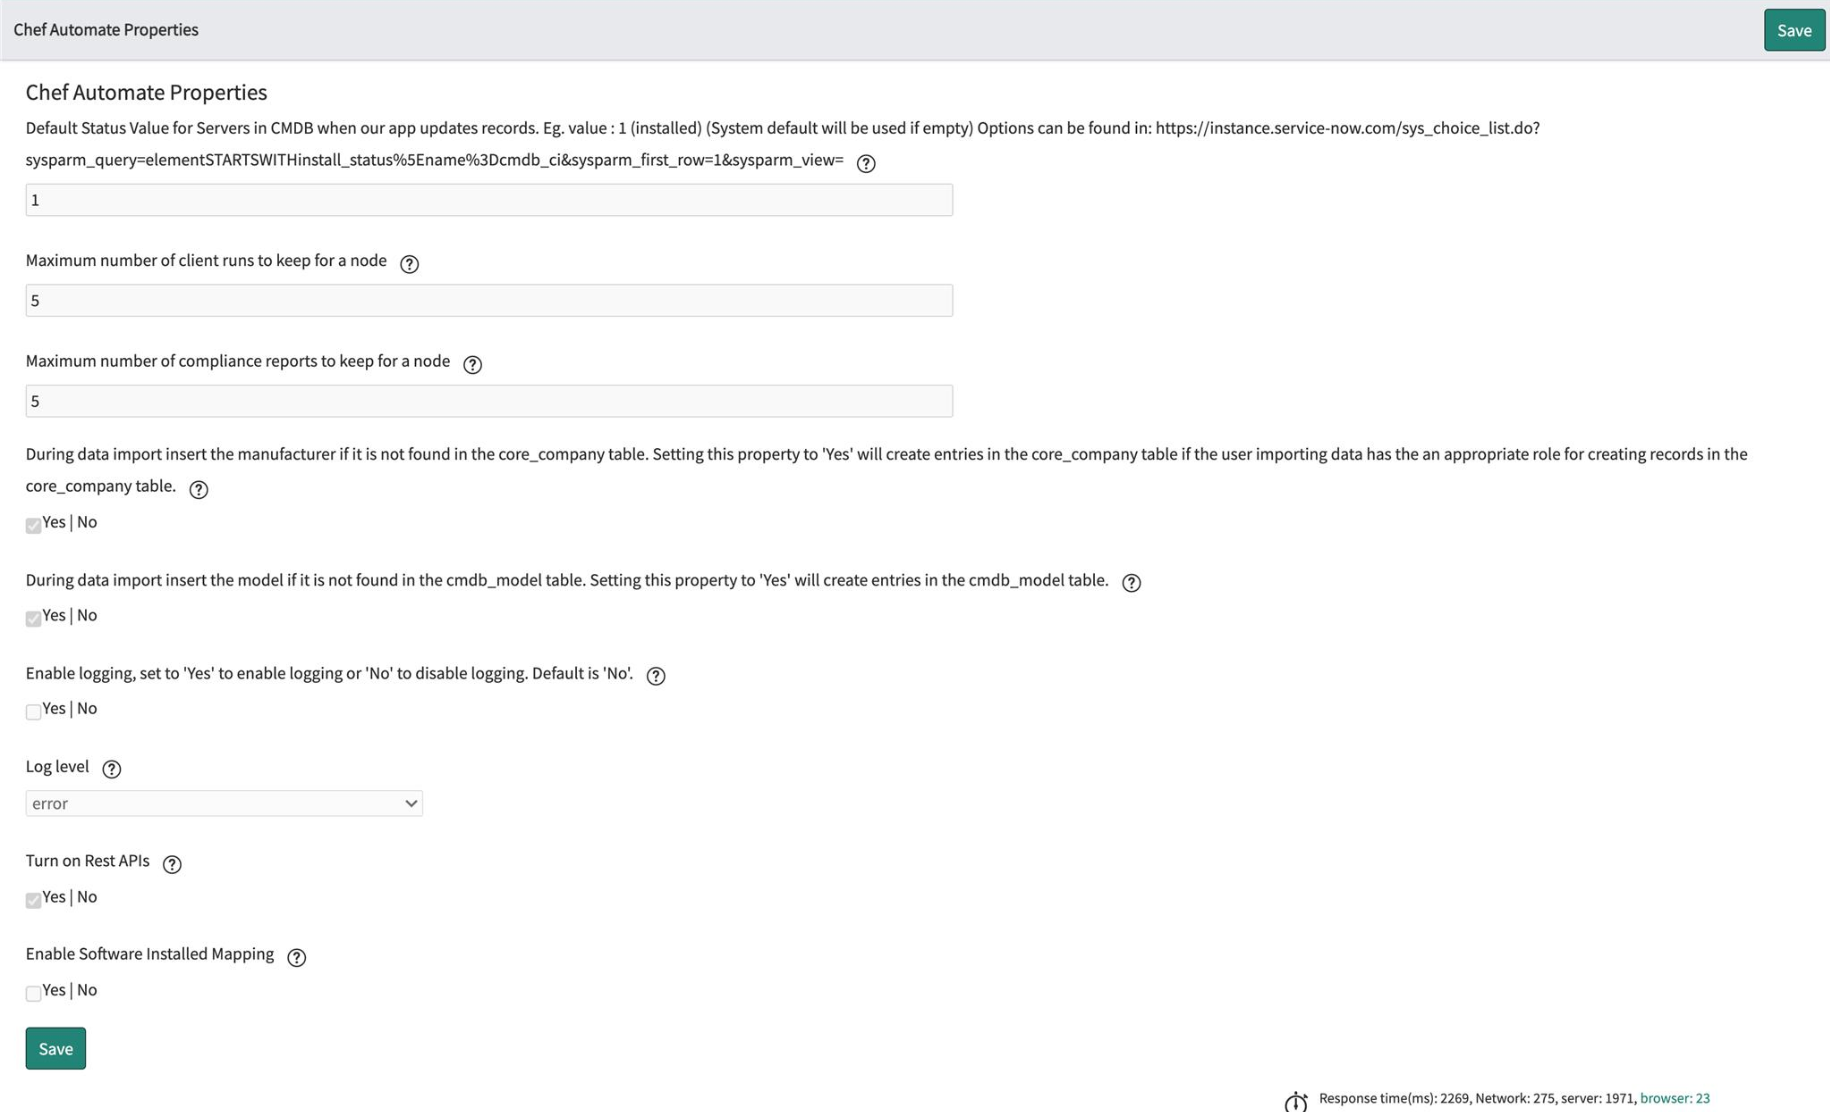
Integration App Properties
The Integration App has nine configurable Application Properties. Changing these settings requires the ServiceNow admin or x_chef_automate.admin permissions.
x_chef_automate.chef.default.status- Used to set up the status of the service record as inserted or updated. Default:
1. x_chef_automate.client_runs_per_node- Used to set a highest number of clients runs for a node. Default:
5. x_chef_automate.compliance_reports_per_node- Used to set a highest number of compliance reports for a node. Default:
5. x_chef_automate.insert_manufacturer- Inserts the new record during the import if a model is not found in the core_company table by settingthe property to Yes. Default:
Yes. x_chef_automate.insert_model- Inserts the new record during the import if a model is not found in the cmdb_model table by setting the property to Yes. Default:
Yes x_chef_automate. logging.enabled- Used to flag the logging with enable or disable values. Default:
No. x_chef_automate.logging.verbosity- Debugs the data in ServiceNow. Enables the selected logging level and is visible in logs. Valid values:
Debug,Warn,Info,Error. Default:Error. x_chef_automate.Rest.api- Enables the Chef Automate API from ServiceNow. Set to
Yesto enable andNoto disable. Valid Values:Yes,No. Default:Yes. x_chef_automate.enable.system.app- Used to enable software installed mappings. Valid Values:
Yes,No. Default:No.
Uninstall
To uninstall the Integration App:
- Navigate to the System Applications > Applications in ServiceNow.
- Open the Downloads tab and select the Chef Automate Incident Creation.
- Navigate to Related Links.
- Select Uninstall.
Was this page helpful?